Make Your Own: Minimalist Art

Minimalist art is my favourite and after seeing the response to my recent DIY artwork on Instagram, it’s clear that you all love it too! What started as an experiential piece has added some much-needed interest and texture into a previously bland and blank entrance space. Although it takes time to build up the layers, it’s a really fun and therapeutic process that I believe anyone will be able to make. So without further ado, you will need:
A box canvas (any size, I used 150x100cm which I’ve linked here)
Interior powder filler (not premixed, I used approximately 6kg)
Water
Scales
A spoon
Mixing bowl
Spray paint (optional should you wish you alter the colour)

Step 1: PREP TIME
Firstly prepare your workspace because it will get messy, I placed a huge piece of cardboard underneath the canvas and turned my guest bedroom into a temporary art studio. You will need plenty of space to walk around the canvas as you’ll be manipulating the mixture in different directions and want it to look great from every angle.
Step 2: GET MIXING
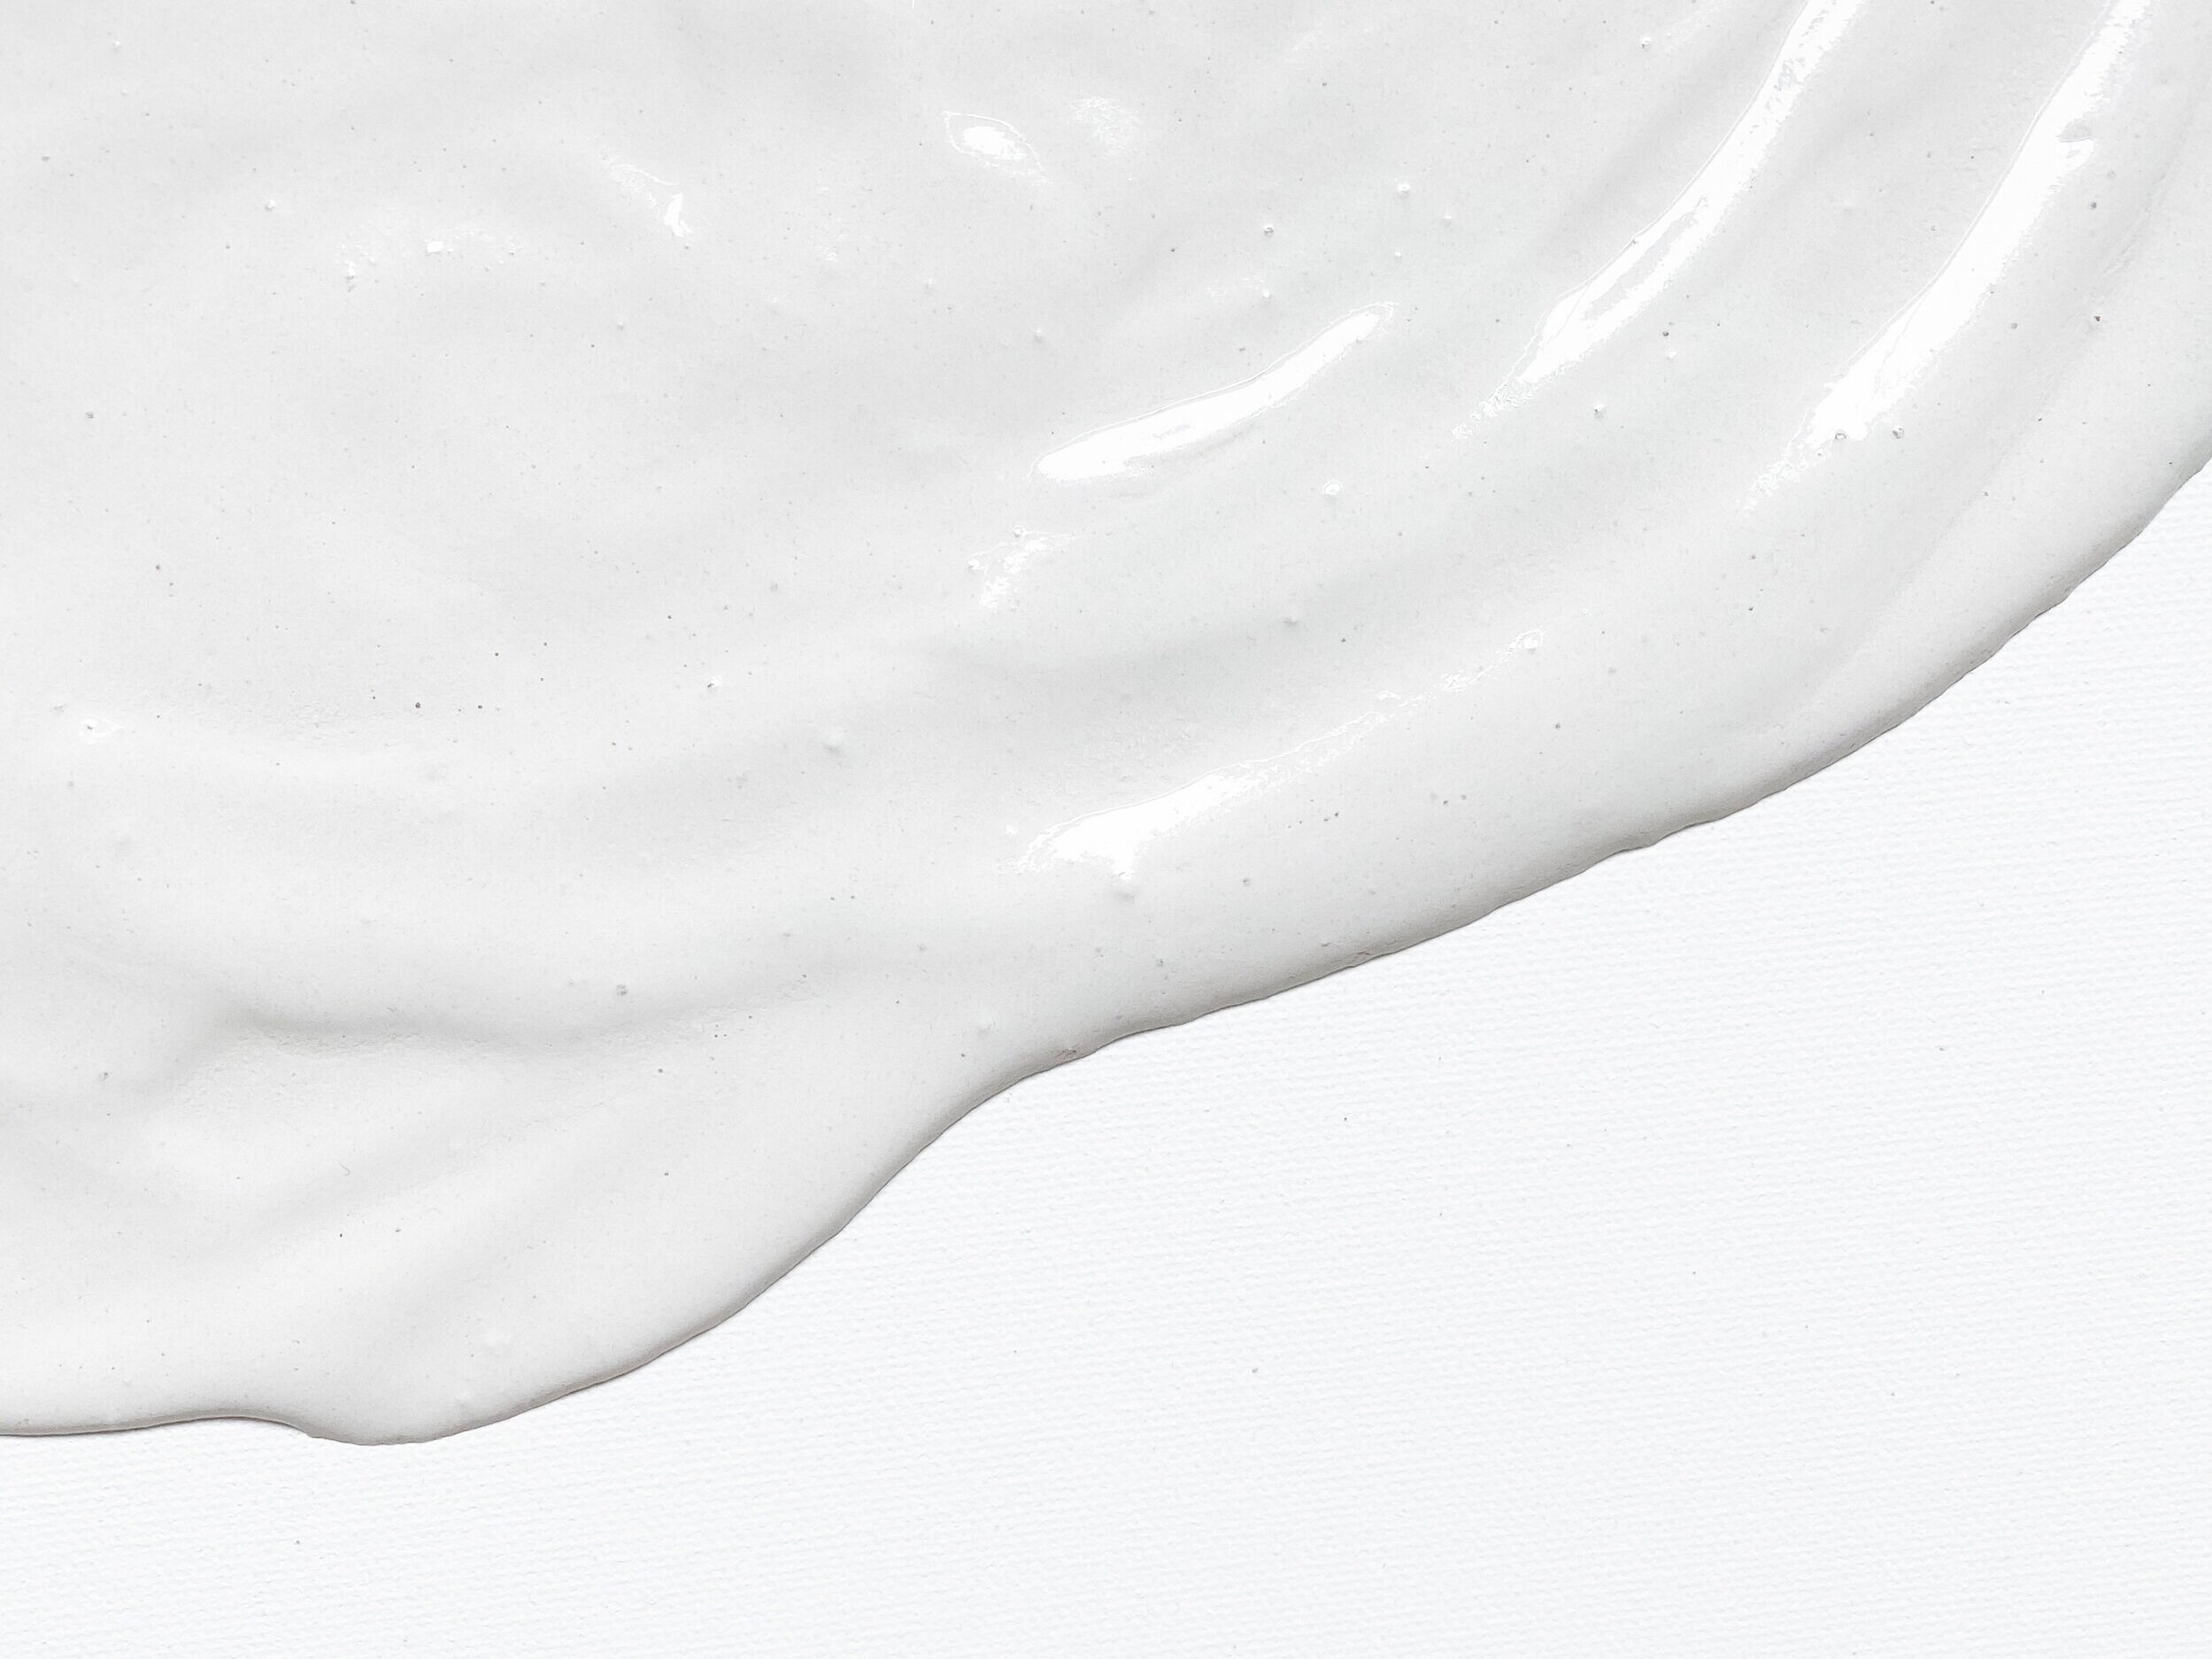
Draw out a rough pattern on the canvas of the shapes you wish to create, I didn’t because it was initially just an experiment and I felt comfortable freestyling but I think it would work better if you did. Mix the filler and water in the ratio of 50/50 or until it becomes similar to the consistency of a cake mixture. This is crucial so that you can comfortably pour and manipulate it. When mixing the filler, only prepare the amount you will need for each shape but don’t worry if it's not quite enough. You will have about 20 minutes to work with the mixture so can always quickly mix up some more if need be.
Step 3: It’s POUR TIME
It’s time for the fun and therapeutic part, pour the mixture into the area you wish the cover. Grab your spoon and gently push the mix to the edge of the shape you require. By pushing it into the canvas fabric, it will bind the two materials together more and therefore prevent it from falling off. Make sure to run the mixture down the edges of the canvas to create a beautiful finish on every dimension.
Wait for approximately 10 minutes and then with the back for the spoon push a little of the mixture from the centre of the shape to the edges, repeat this process several times to create a ripple effect. This is the beginning of textured element of the art. For an alternative texture, add a little of the mixture onto the spoon and let it drip onto the shape below from different heights to create a raindrop effect which is equally as beautiful.
Repeat this process for the largest shapes on the canvas, it is key that they don’t merge otherwise you will lose the uneven texture which contributes to the overall look, so pour at staggered times if necessary.
Then leave the canvas to dry for between 12-24 hours.
Step 4: FILL IN THE GAPS
Now that you have filled in most of the canvas, you will notice that there are gaps of varying sizes in between the shapes already poured, that look a little how the base of leopard print pattern looks. I saw this space as a ravine between islands but maybe that justs my exaggerative imagination, but that’s what I am going to call it from now on! You want to fill this area with a lot less filler so that the different levels are obvious and so it doesn’t become one flat plane.
Mix up the filler again, this time using a ratio of 60/40, or to the consistency of a semi-thick pancake batter. Using just a spoon this time, sparingly pour the mixture into the ravines, and ever so gently push it to the edges of the shapes. You want it to be as thin as possible almost like a coat of paint, wait for 5 minutes and then to add a little texture place your spoon over the partially dry mixture, wiggle and then remove it.
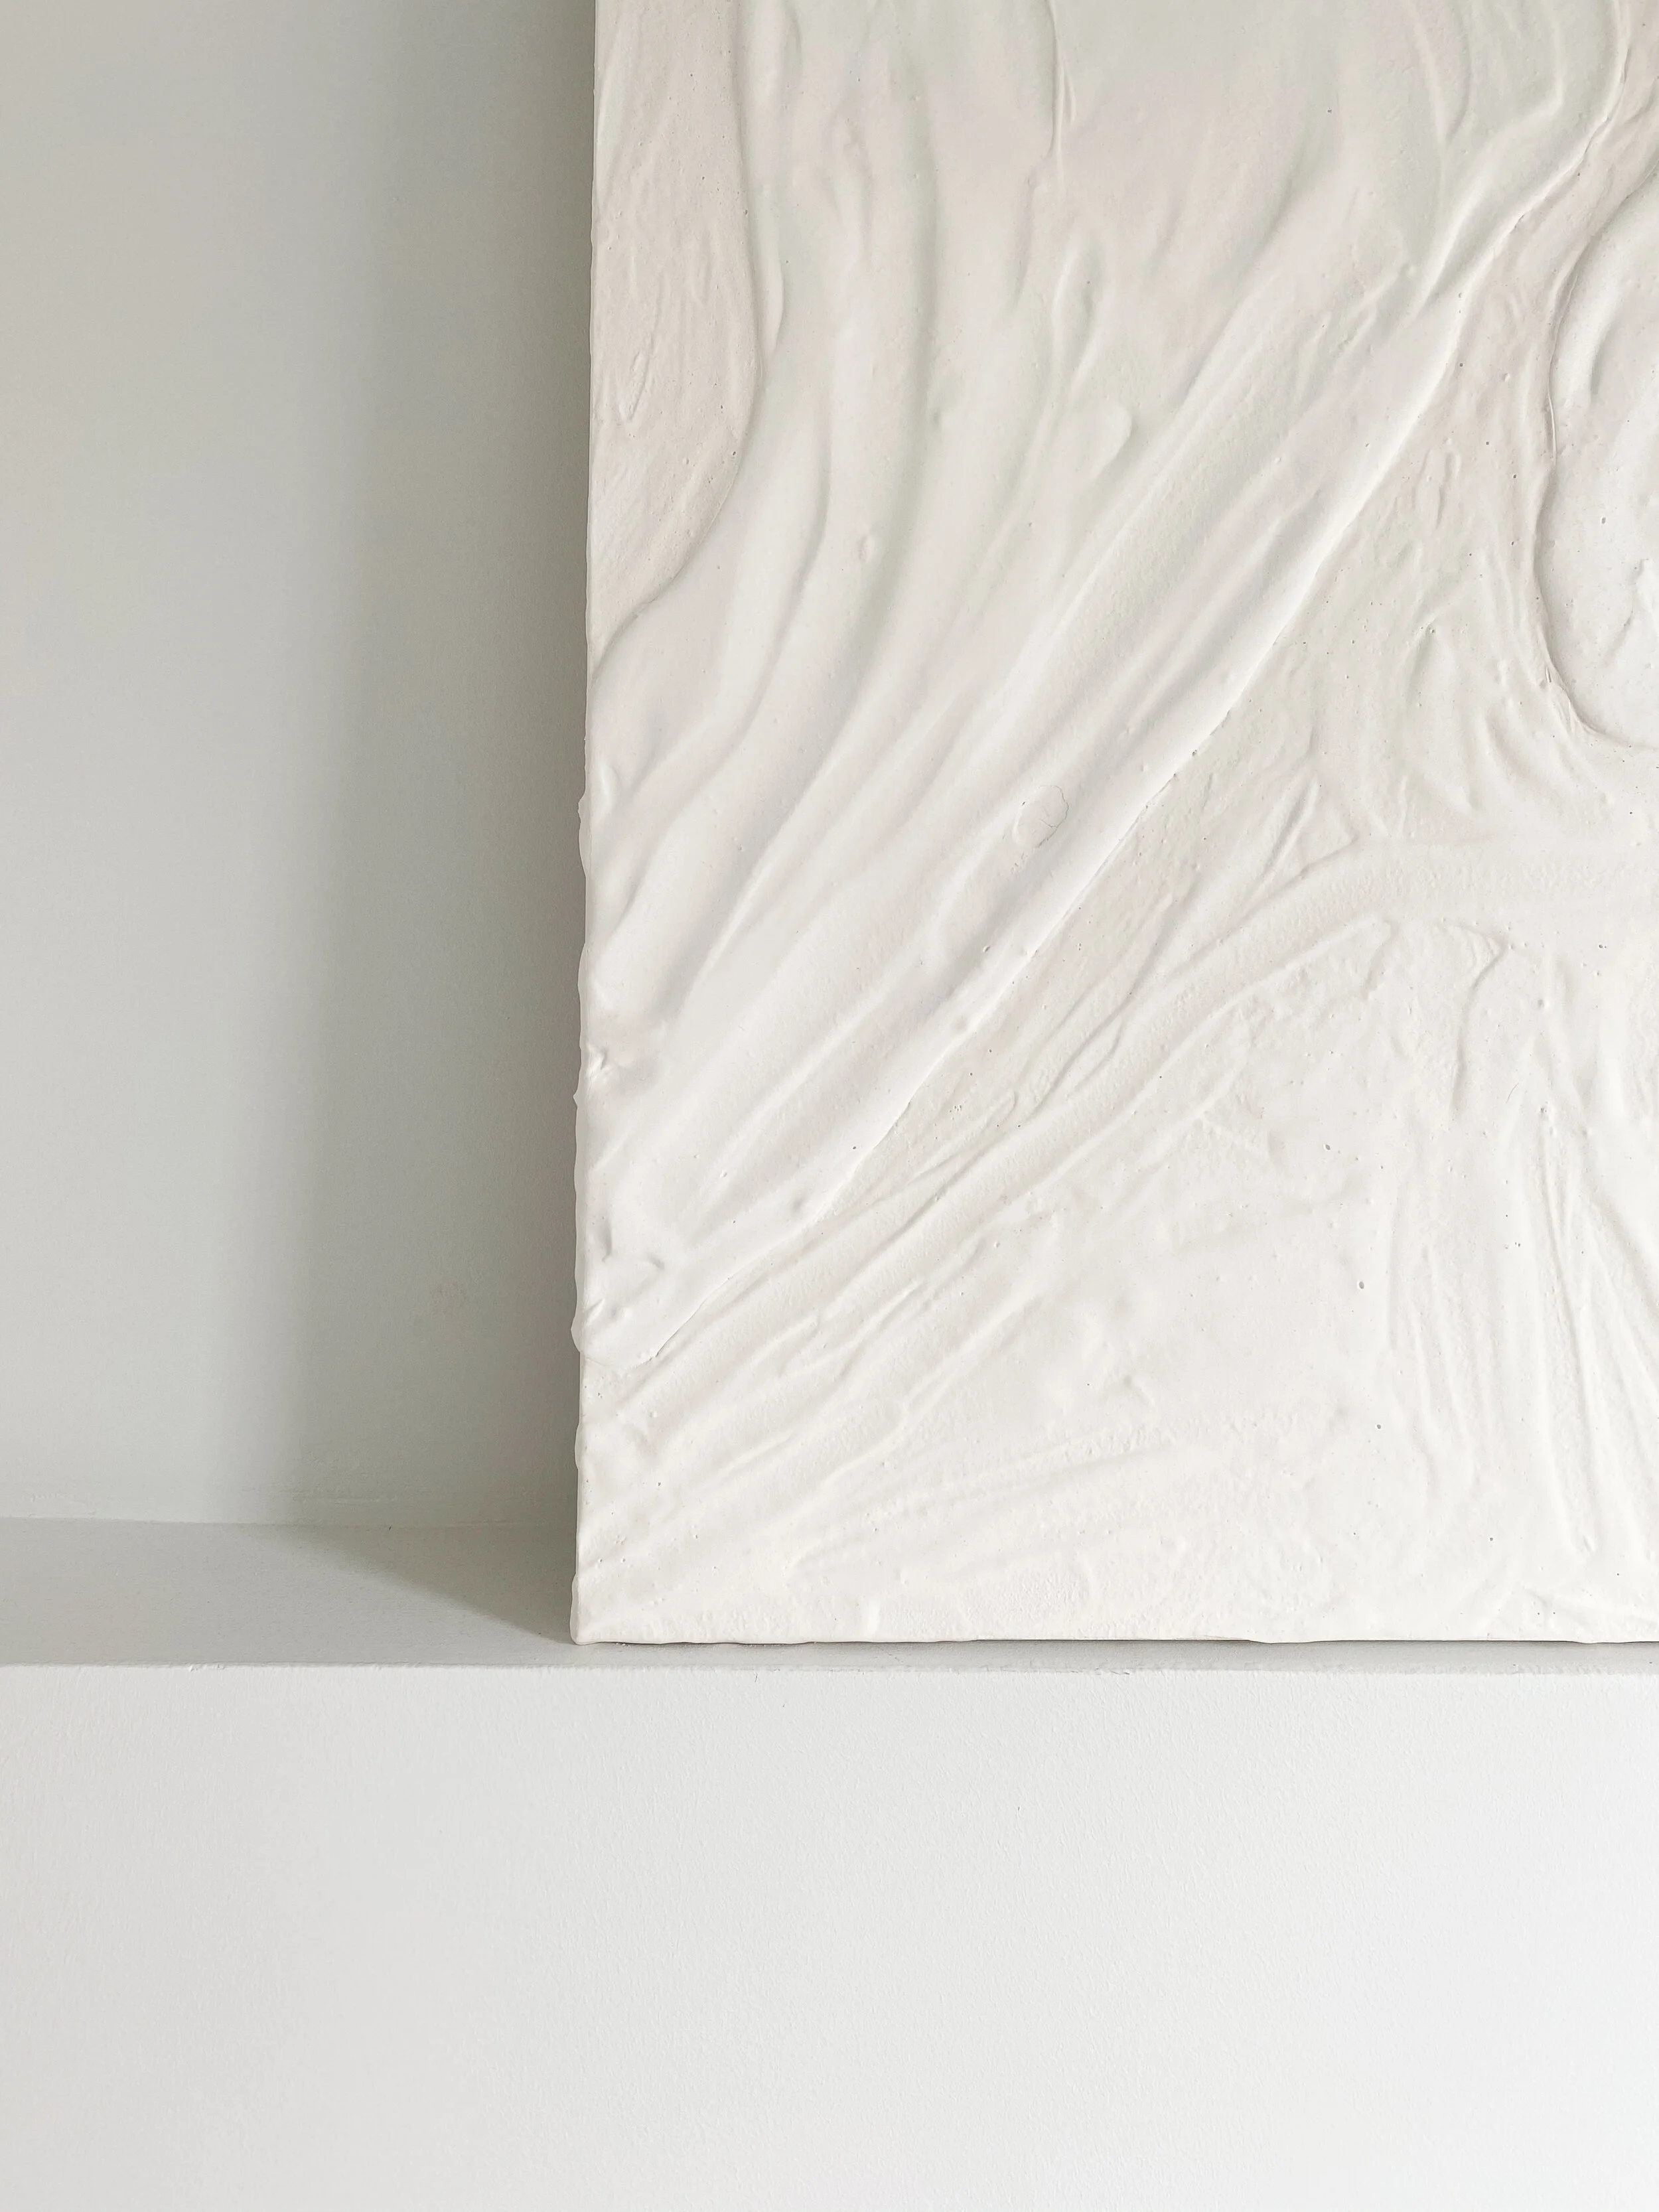
Now it may look complete, but leave the canvas to dry for at least 48 hours.


Step 5: hang your masterpiece
At this point you can choose to add some colour, I didn’t as I found it to naturally be the perfect finish so haven’t yet experimented, but just remember that the filler is incredibly porous so you might not get a consistent finish the first time you spray it.
Finally, your artwork is ready to hang! It will feel incredibly fragile, which is why I don’t recommend making a frame for it as you will risk cracking it. However, it will be secure enough to hang as is, just be delicate when doing so. The natural bounce that comes from the box canvas fabric will prevent it from cracking, I just don’t recommend you hang it in an area where it is likely to be bumped!

Share Your Creations
I would love to see what you make and how you interpret this technique on different scales, so please make sure to tag my account @annabel.field to show me your creations! I found it an incredibly therapeutic and rewarding process, and I really hope you do too!